> ## Documentation Index
> Fetch the complete documentation index at: https://docs.revize.app/llms.txt
> Use this file to discover all available pages before exploring further.
# Launch Revize in Minutes
> Install Revize, set your edit window, choose what customers can edit, add the app blocks, and go live in minutes.
**No developers or custom code needed.** Install the app, choose your settings, add the app blocks, and customers can start editing orders right away.
## 1. Install the app
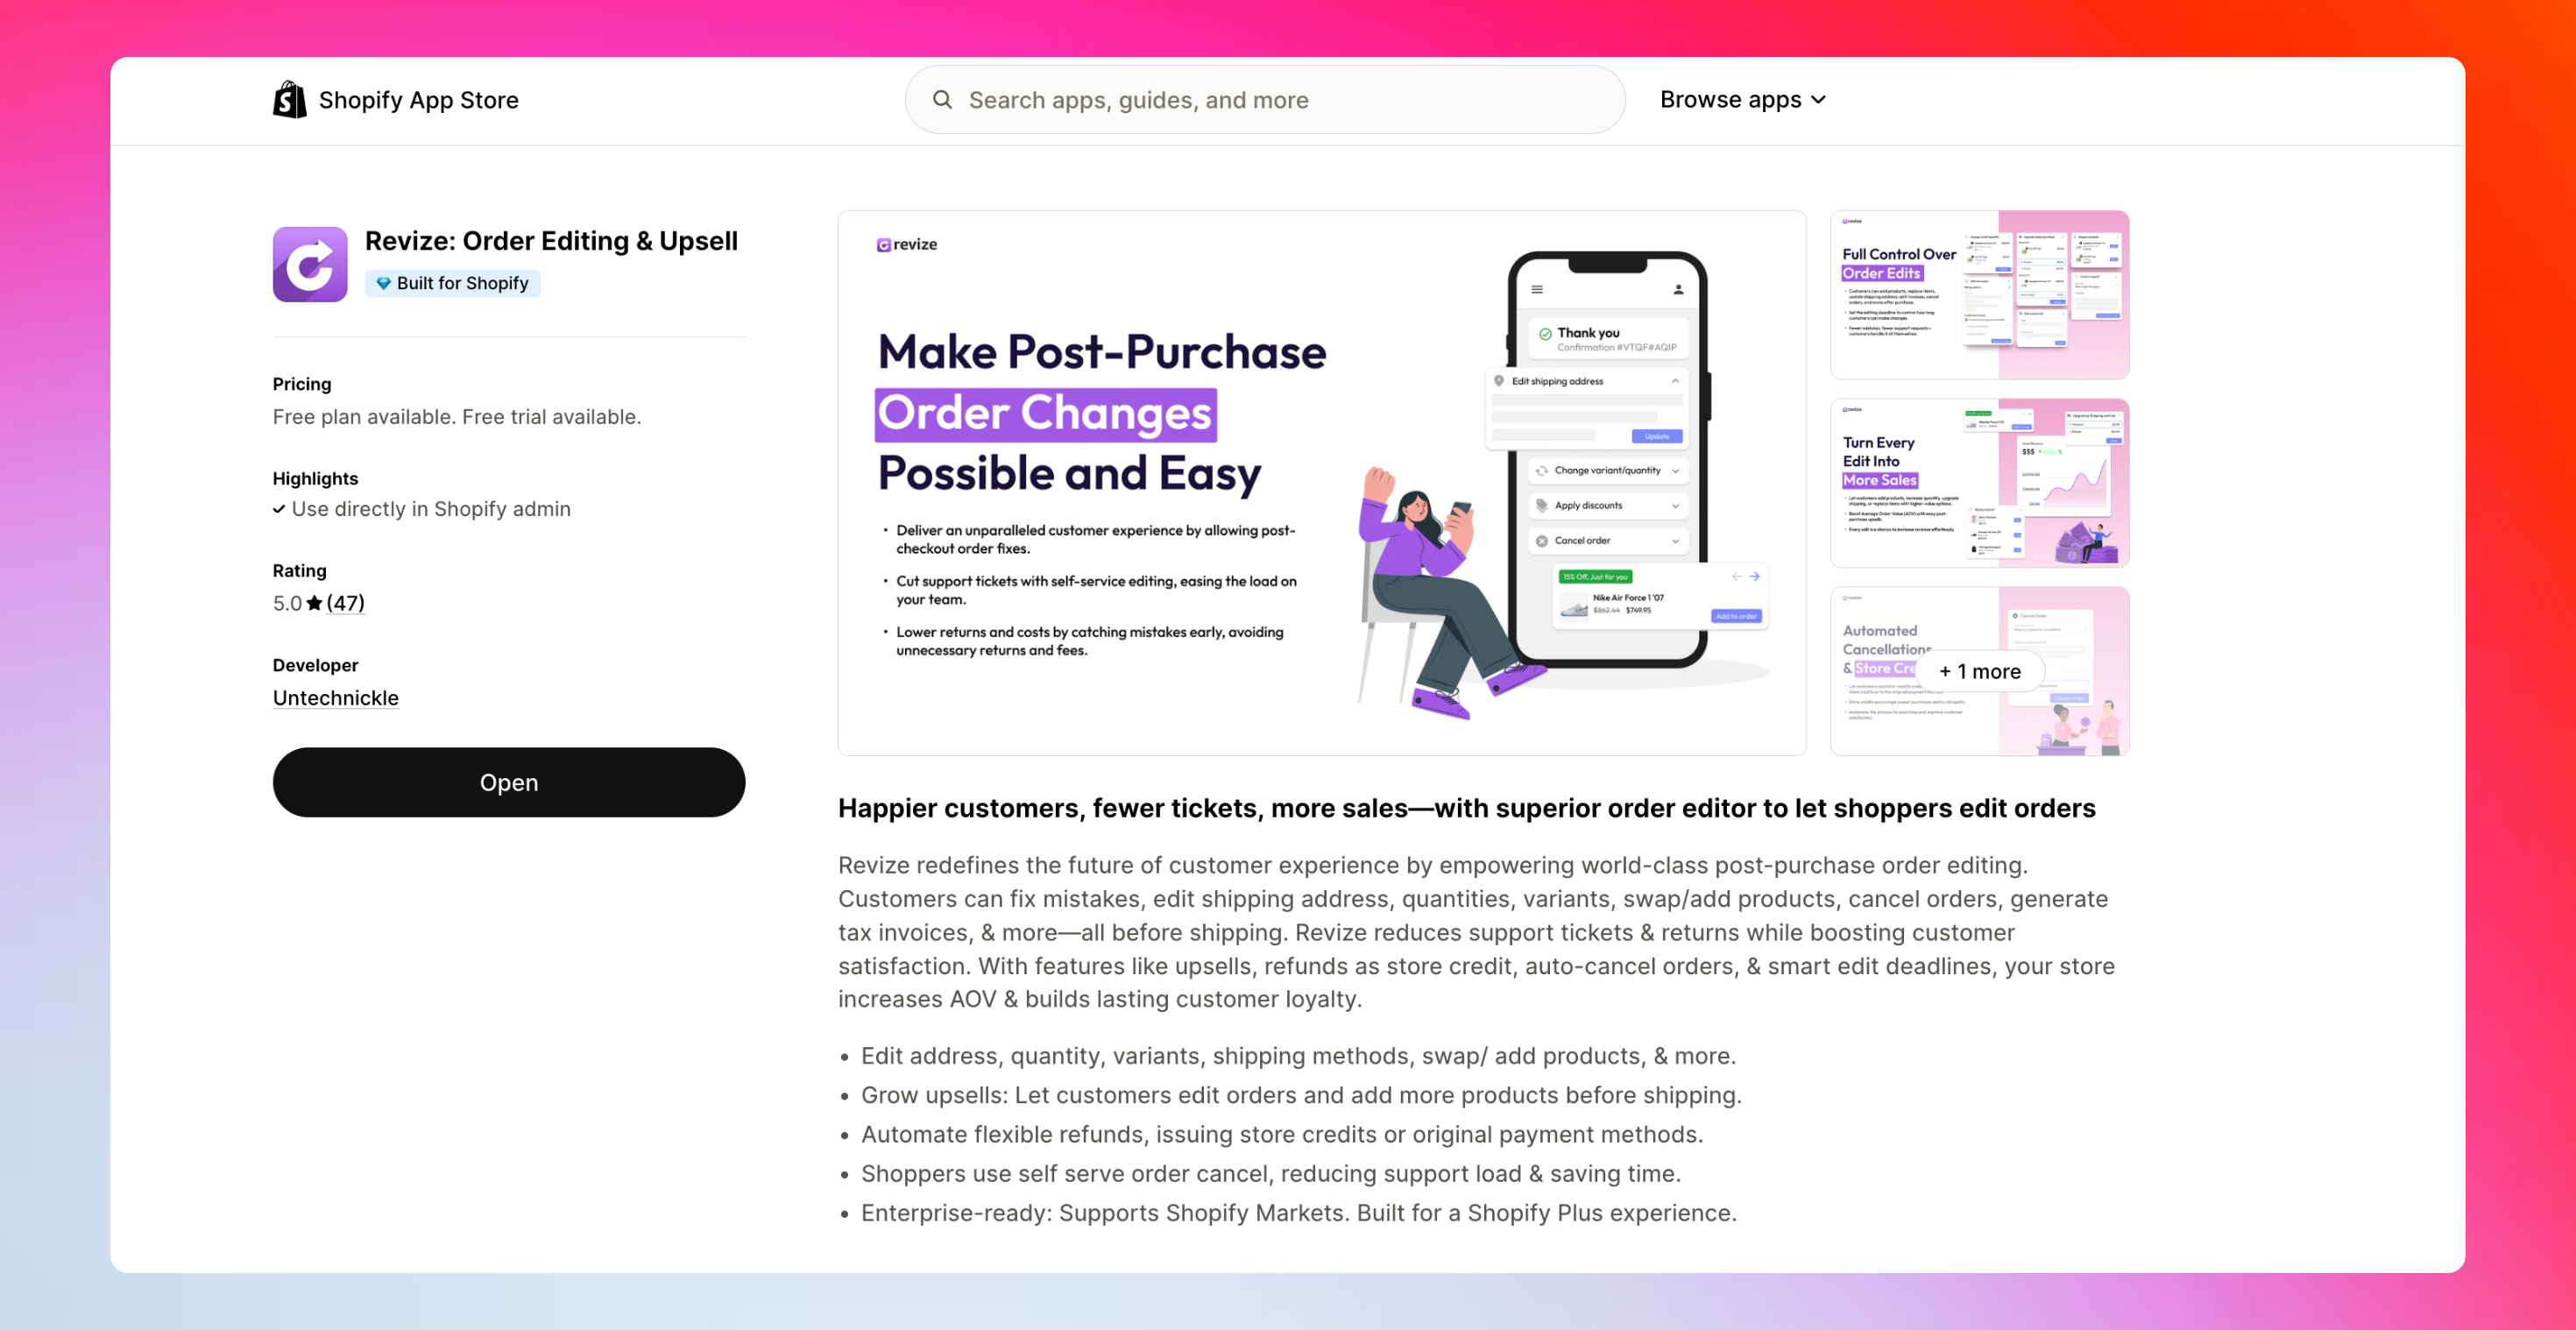
Go to the Revize listing and click Add app.
Shopify will ask for the access Revize needs to manage orders, payments, and fulfillment. Approve to continue.
 ***
## 2. Set the edit deadline
By default, Revize places new orders on hold. This gives customers time to make edits before fulfillment starts. You can turn the hold off if your workflow needs immediate processing.
In the Revize app, select Order Editing in the left sidebar.
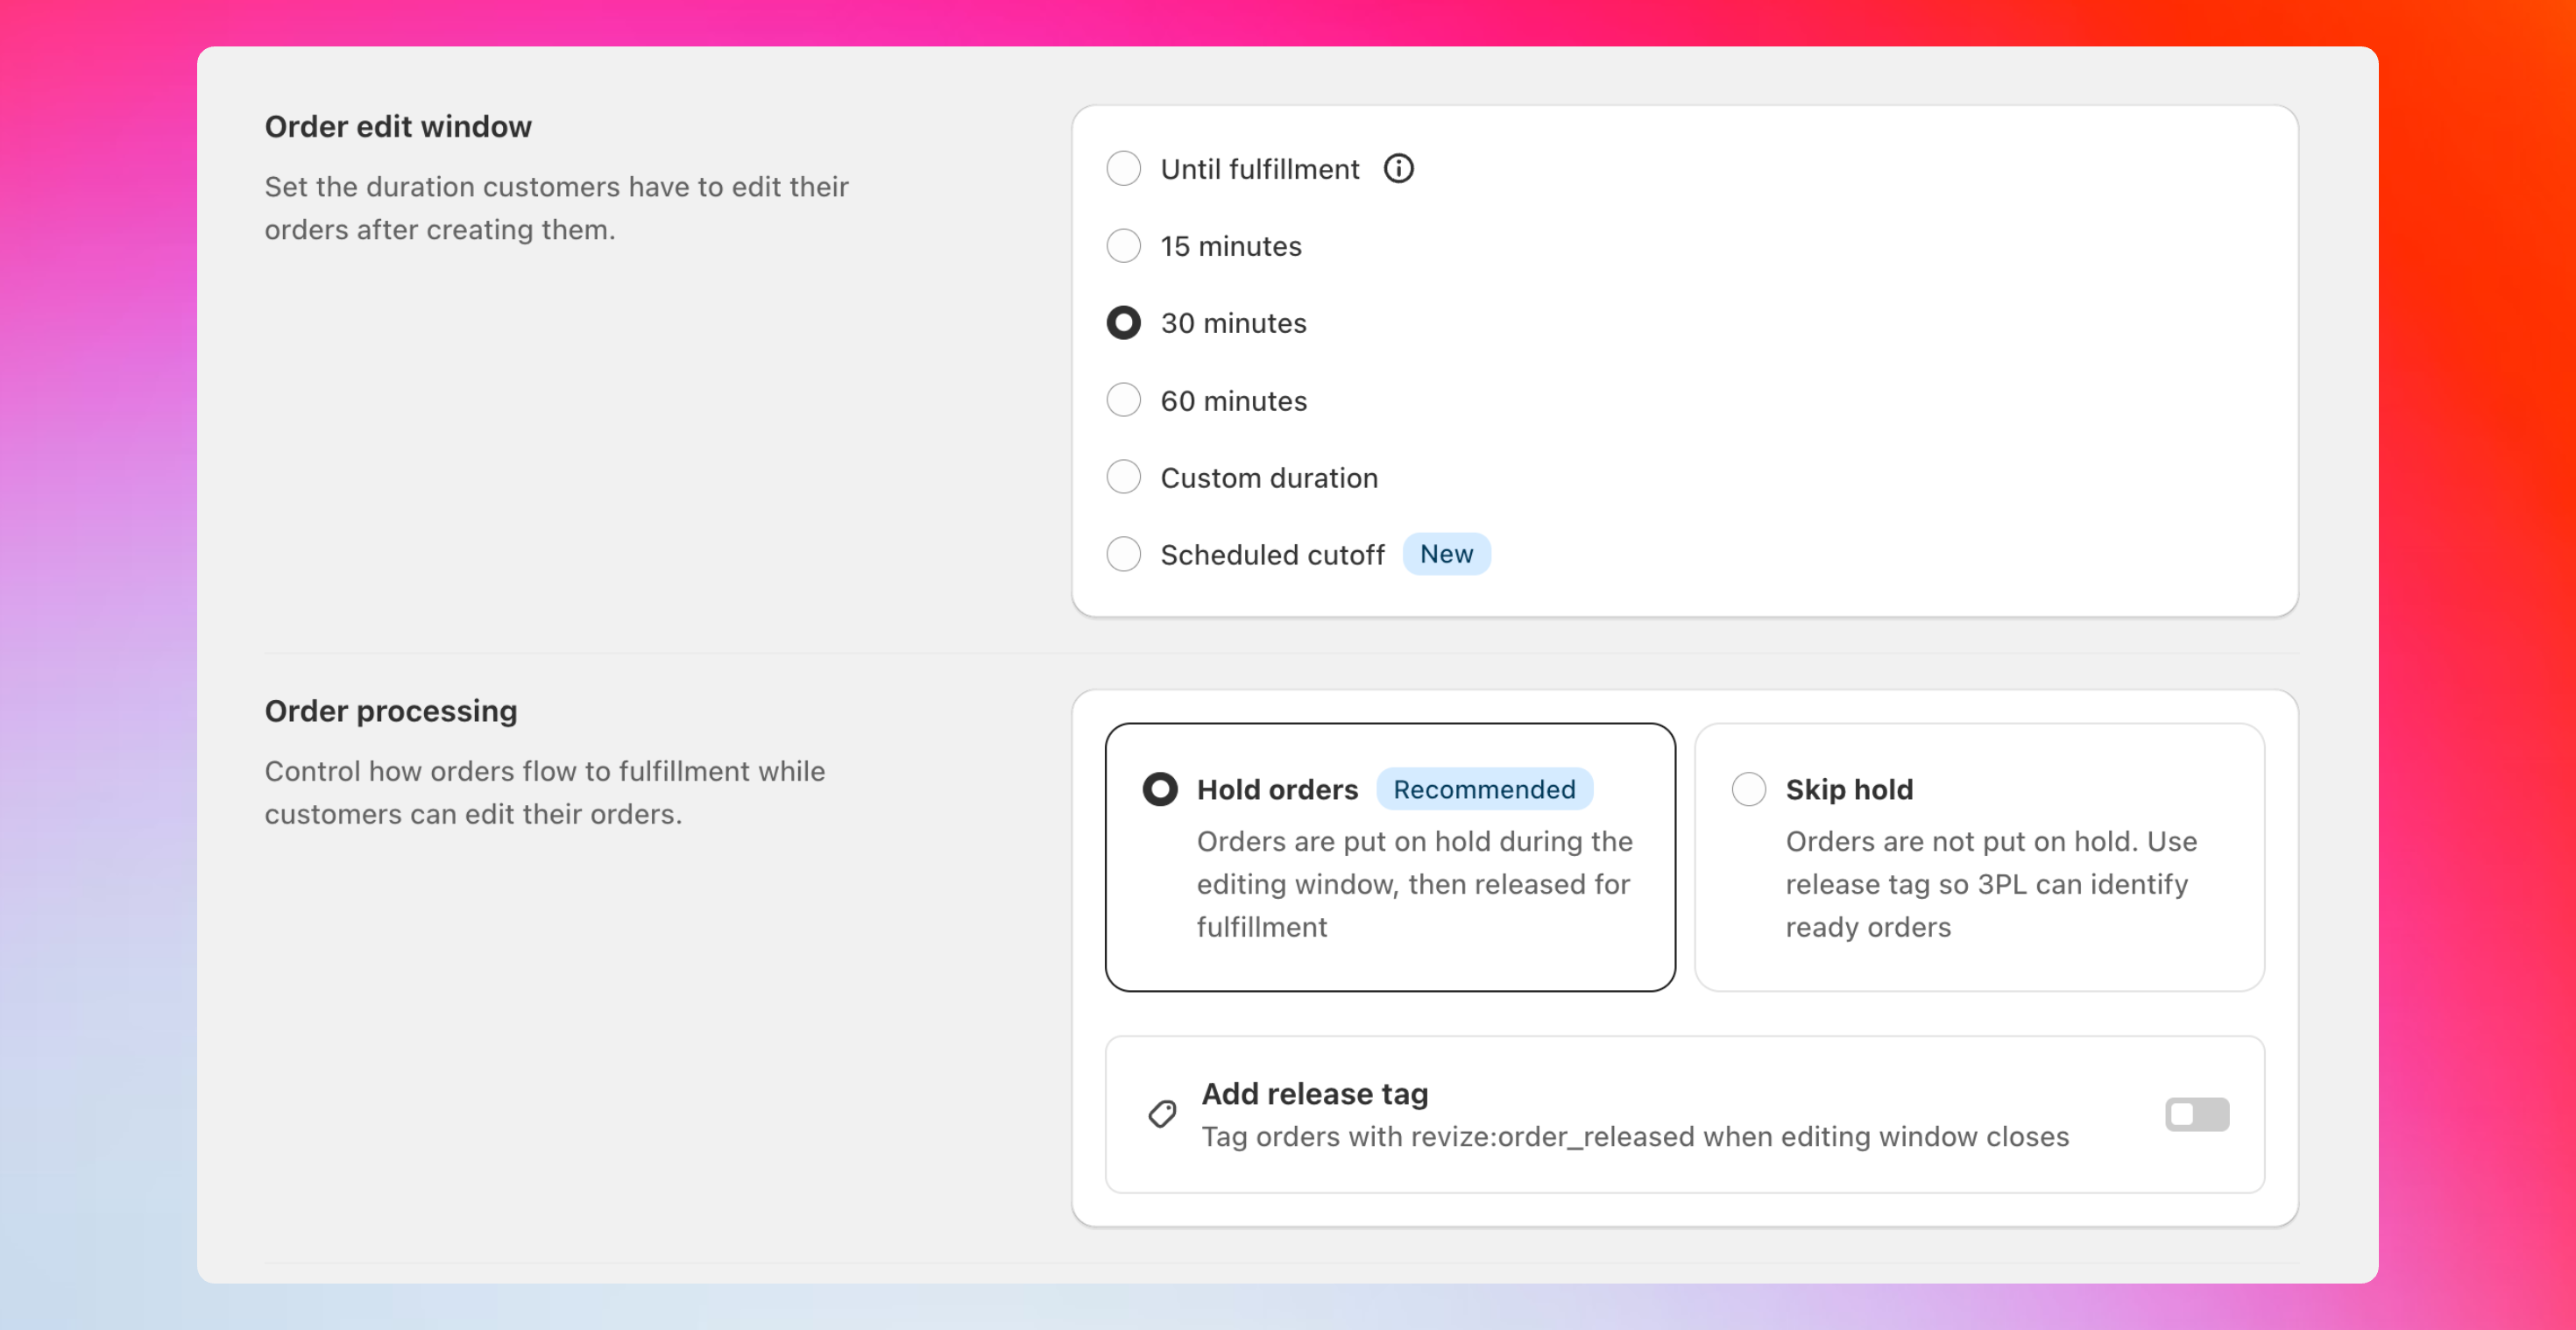
Choose a preset like 15, 30, or 60 minutes, set a custom duration, or pick a scheduled cutoff time.
Select Hold orders for the edit window, or Skip hold if your 3PL only pulls finalized orders. Optionally add a release tag for ready orders.
Click Save.
***
## 2. Set the edit deadline
By default, Revize places new orders on hold. This gives customers time to make edits before fulfillment starts. You can turn the hold off if your workflow needs immediate processing.
In the Revize app, select Order Editing in the left sidebar.
Choose a preset like 15, 30, or 60 minutes, set a custom duration, or pick a scheduled cutoff time.
Select Hold orders for the edit window, or Skip hold if your 3PL only pulls finalized orders. Optionally add a release tag for ready orders.
Click Save.
 ***
## 3. Choose payments and refunds
If an edit changes the order total, Revize handles the difference automatically. No spreadsheets. No manual work.
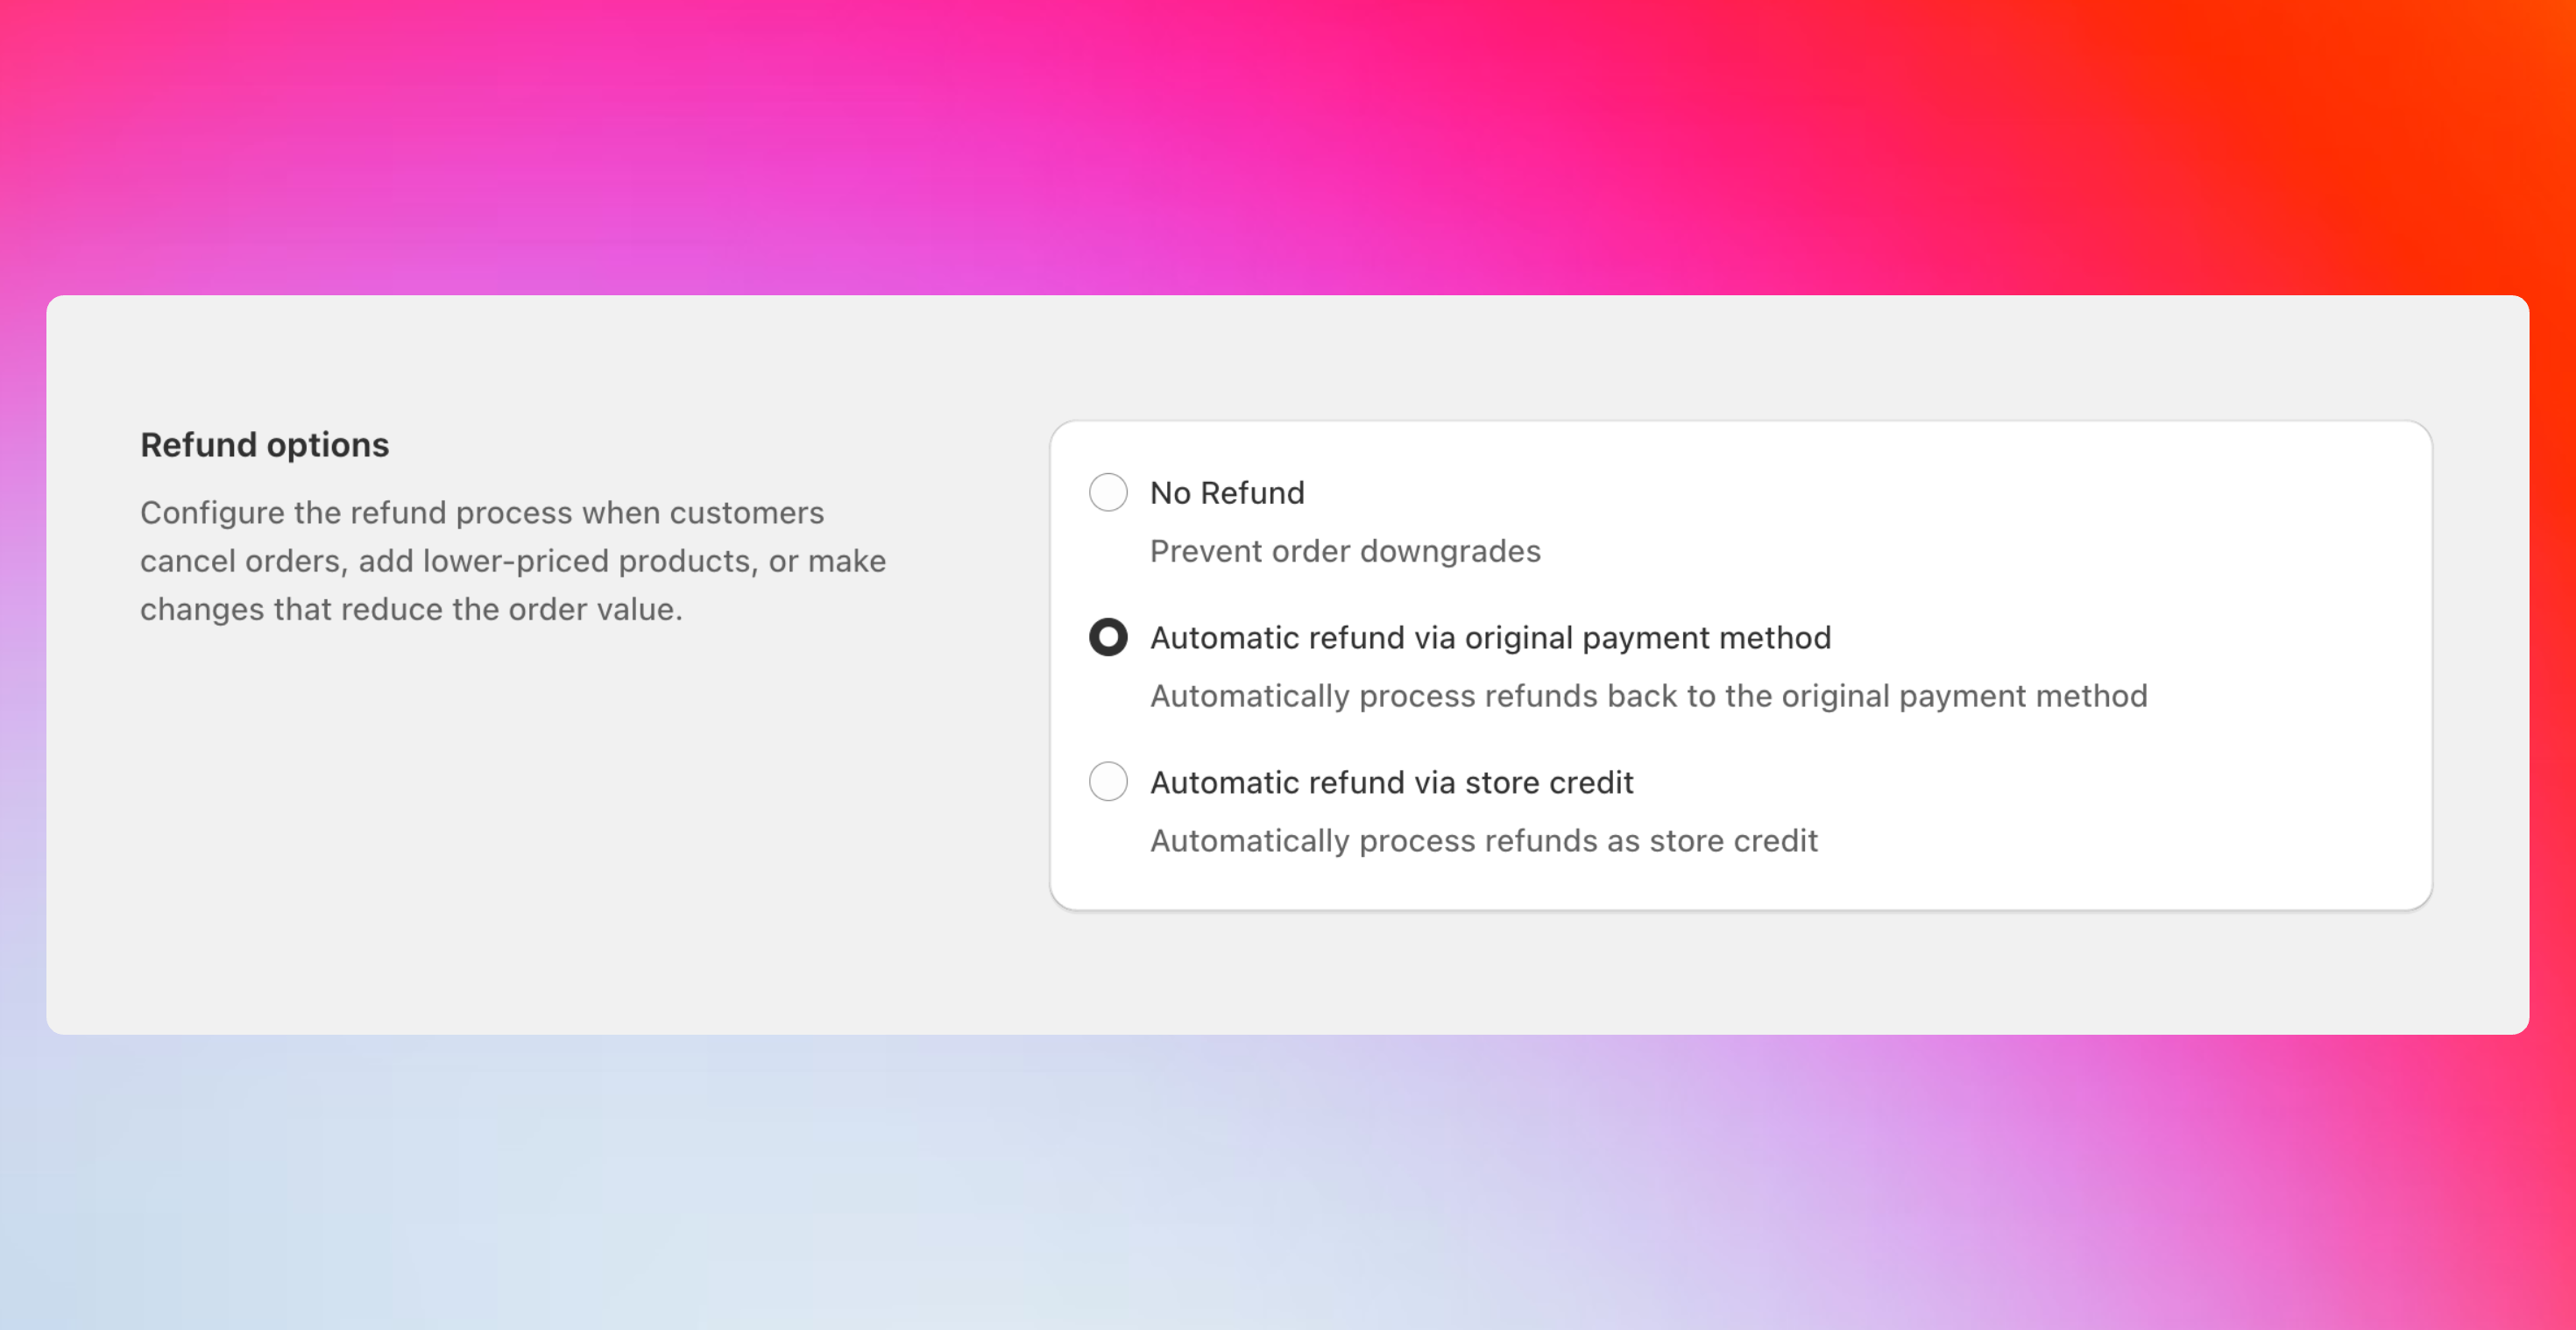
In Order Editing, scroll to Refund options.
Choose one: No refund, Refund to original payment, or Refund as store credit.
Click Save.
***
## 3. Choose payments and refunds
If an edit changes the order total, Revize handles the difference automatically. No spreadsheets. No manual work.
In Order Editing, scroll to Refund options.
Choose one: No refund, Refund to original payment, or Refund as store credit.
Click Save.
 ***
## 4. Select what customers can edit
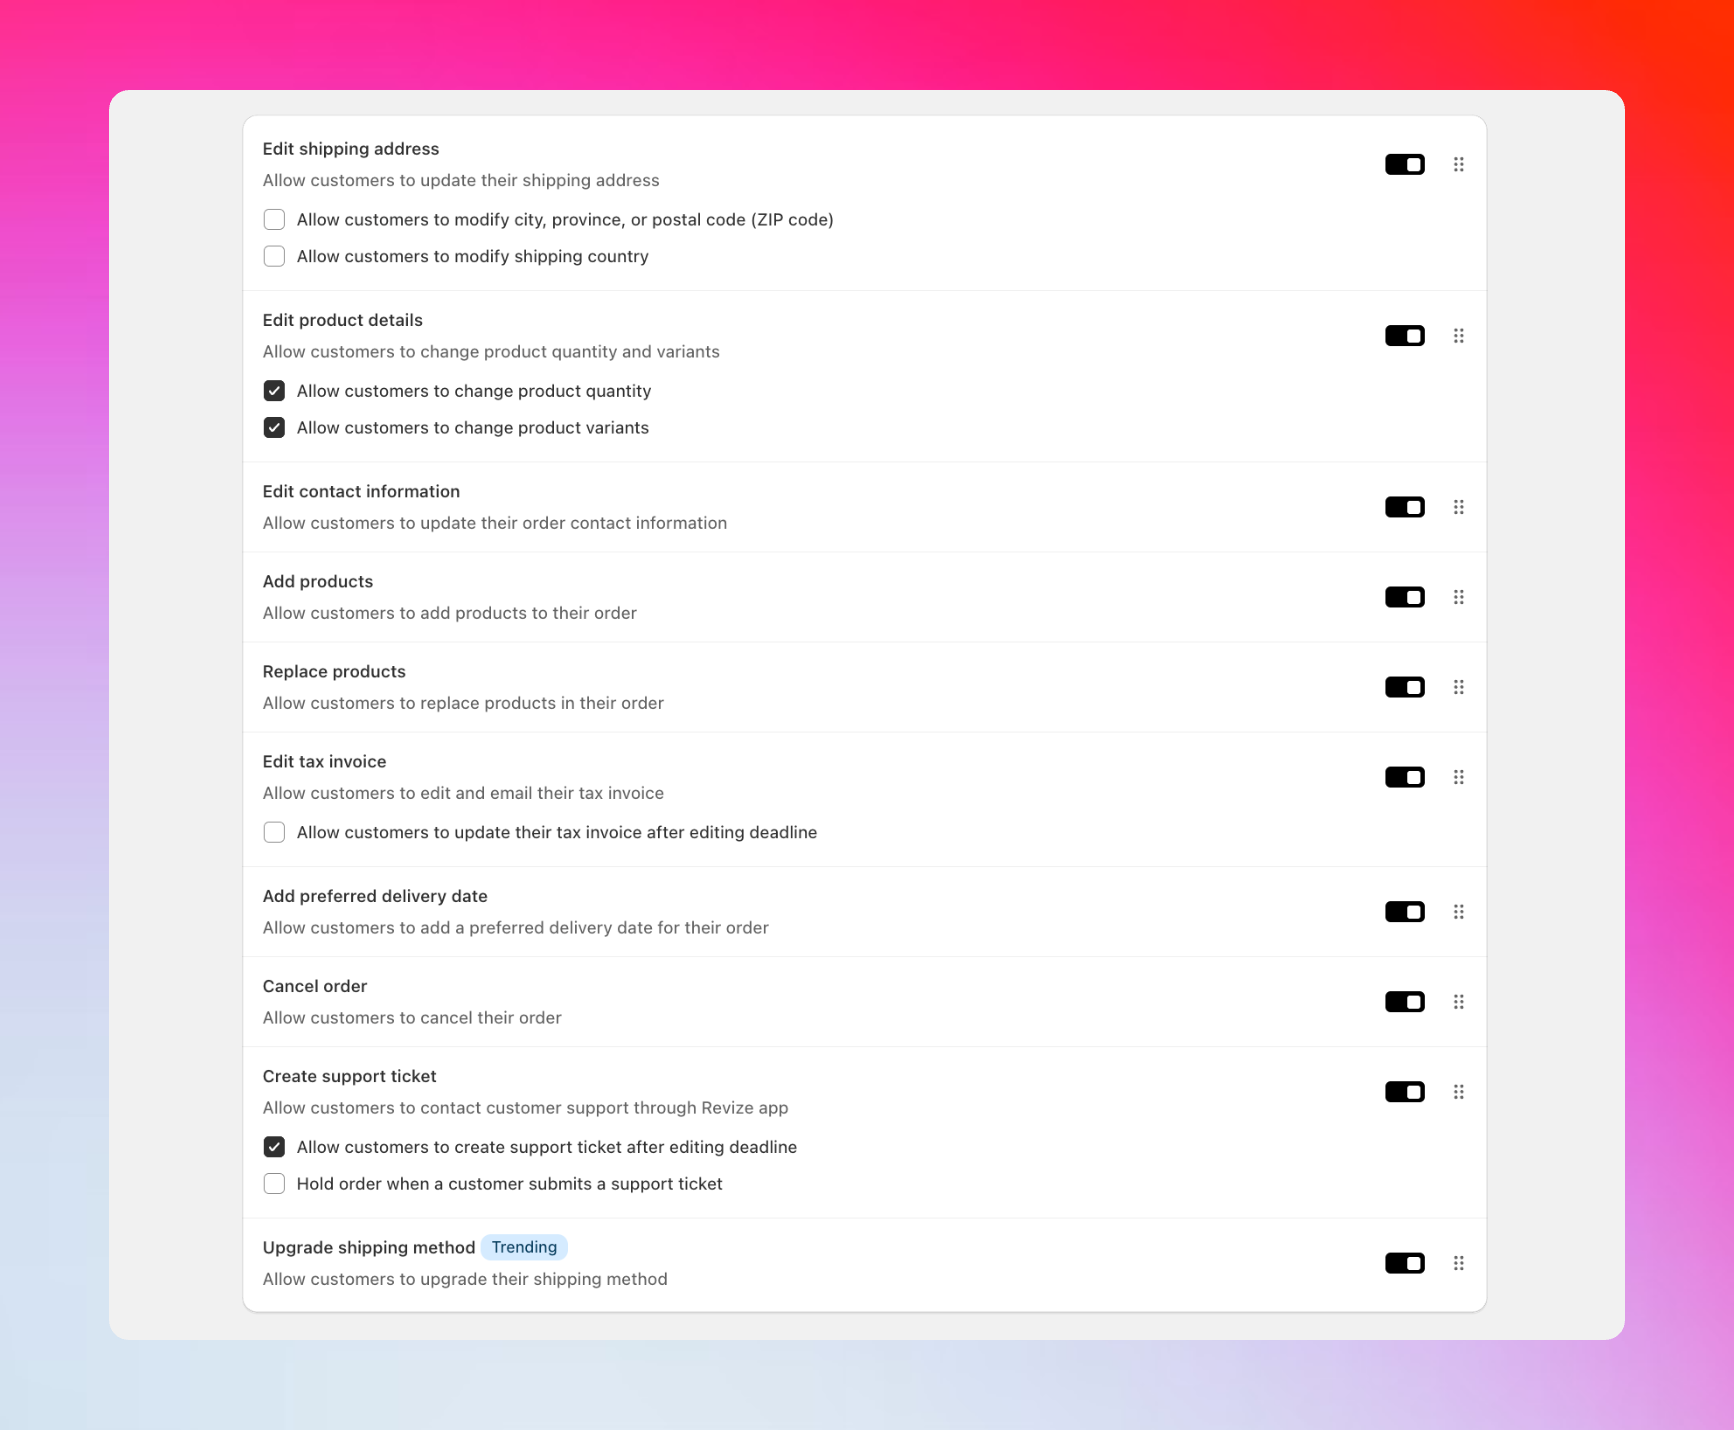
In Order Editing, scroll to Customer edit options.
Enable the options that fit your store. Shipping address, variant and quantity, add or replace products, apply discount codes, upgrade shipping, cancel order, invoice and tax info, delivery date, and support ticket.
Click Save.
***
## 4. Select what customers can edit
In Order Editing, scroll to Customer edit options.
Enable the options that fit your store. Shipping address, variant and quantity, add or replace products, apply discount codes, upgrade shipping, cancel order, invoice and tax info, delivery date, and support ticket.
Click Save.
 ***
## 5. Add the app blocks
Add Revize to the Order Status page and the Thank You page in the Shopify checkout editor. This is where customers edit their orders.
In Shopify admin, go to Settings, then Checkout, then Customize.
In the page picker at the top, choose Order status page. Click Add block, then add Revize Customer Portal and Revize Notifications. Click Save.
Switch the page picker to Thank you. Click Add block, add Revize Order Edit Message, then Save.
***
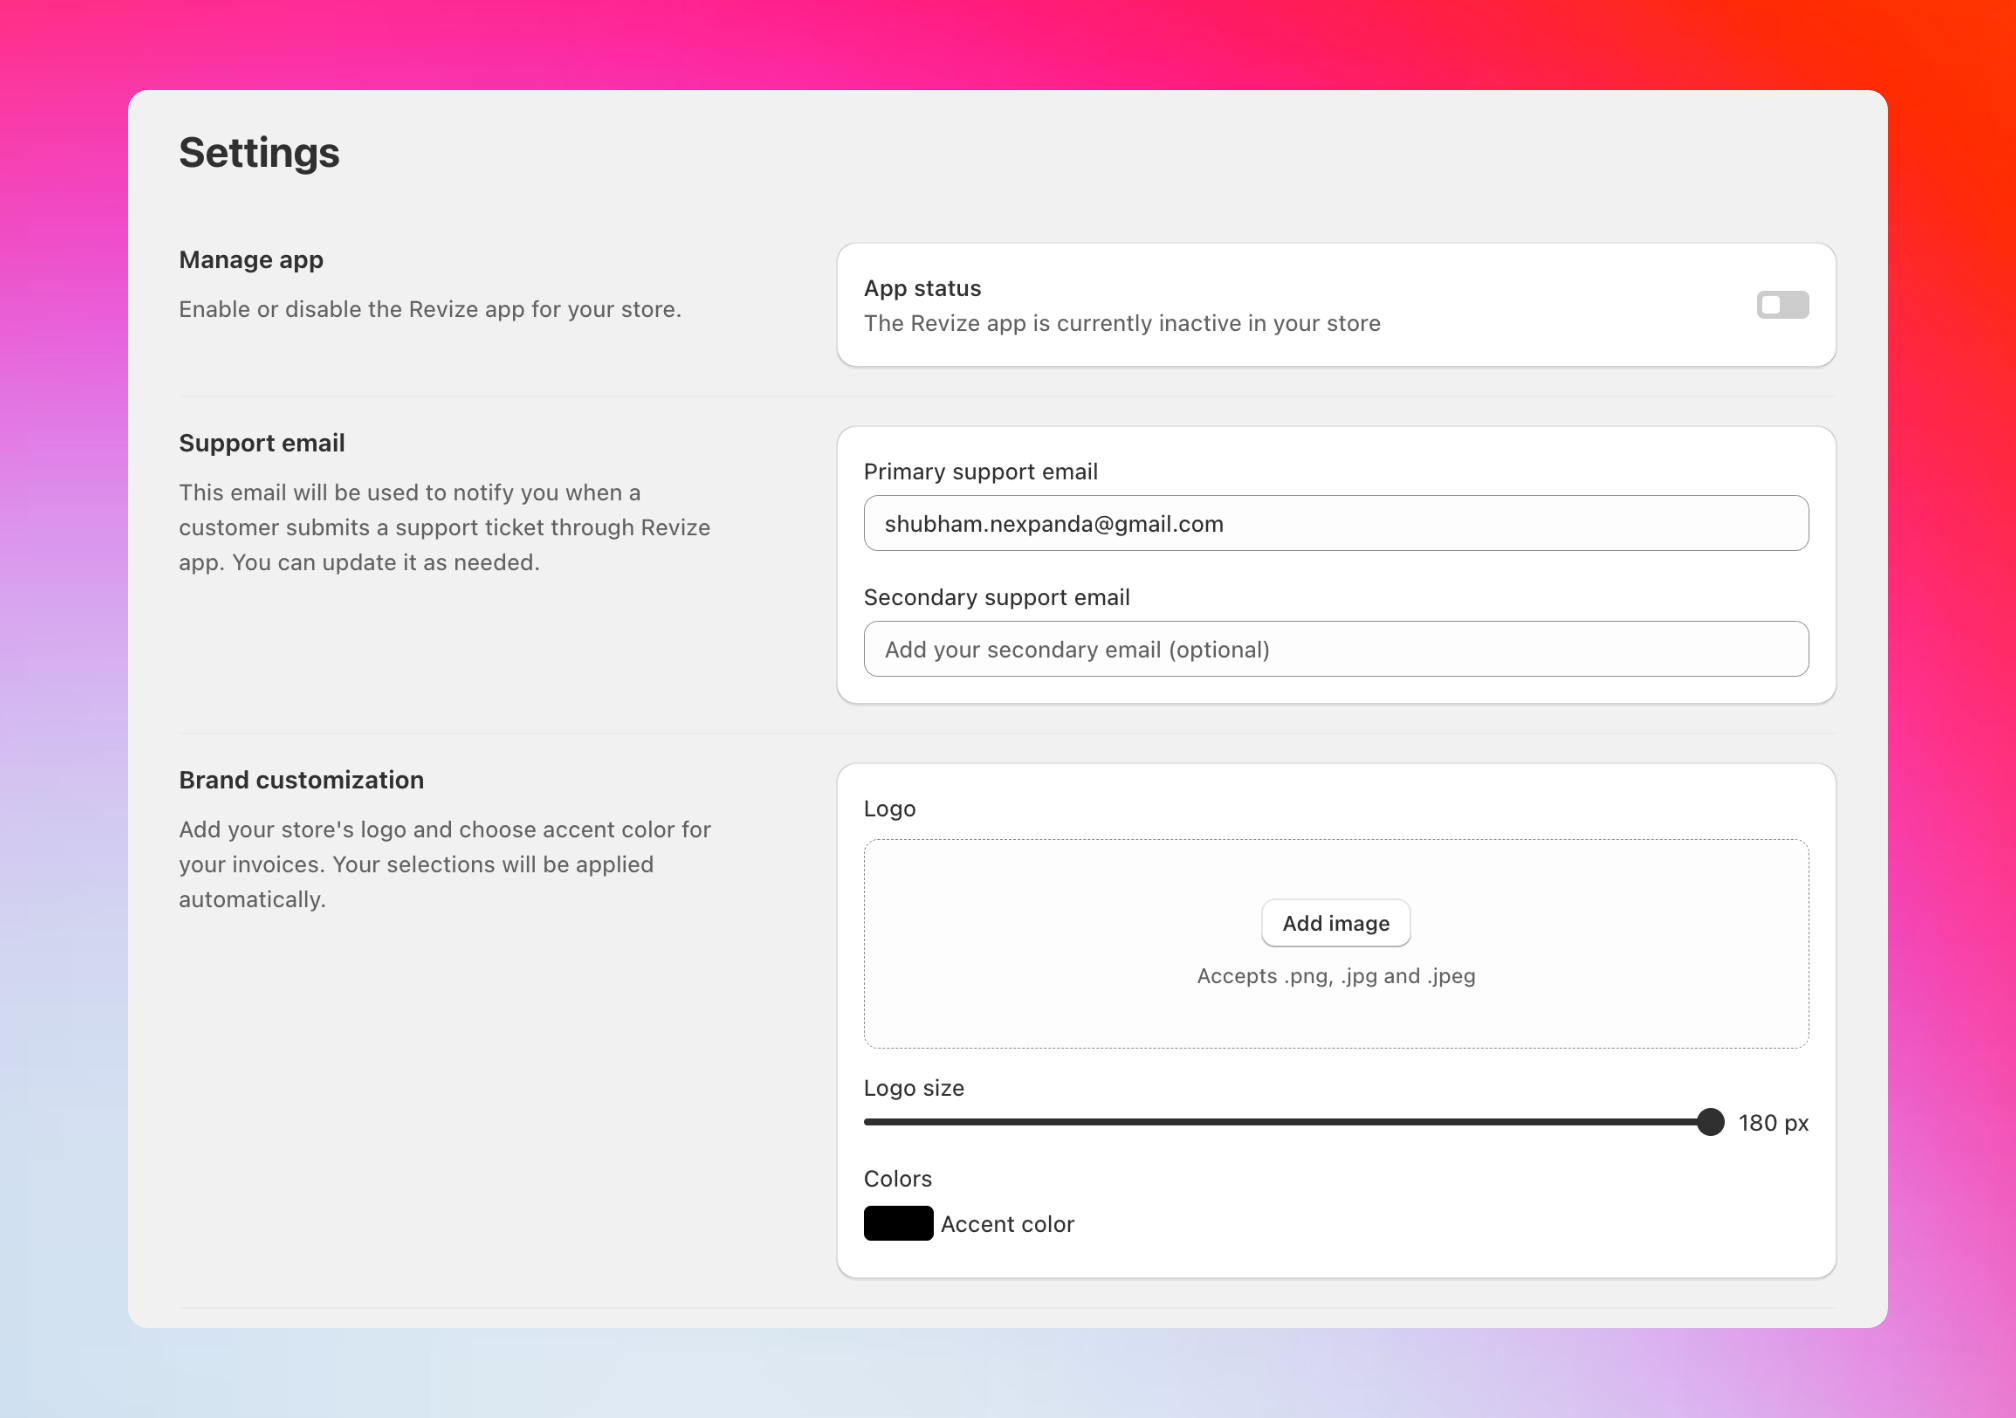
## 6. Enable the app
Go to Settings in the Revize sidebar. Turn on App status.
***
## 5. Add the app blocks
Add Revize to the Order Status page and the Thank You page in the Shopify checkout editor. This is where customers edit their orders.
In Shopify admin, go to Settings, then Checkout, then Customize.
In the page picker at the top, choose Order status page. Click Add block, then add Revize Customer Portal and Revize Notifications. Click Save.
Switch the page picker to Thank you. Click Add block, add Revize Order Edit Message, then Save.
***
## 6. Enable the app
Go to Settings in the Revize sidebar. Turn on App status.
 ***
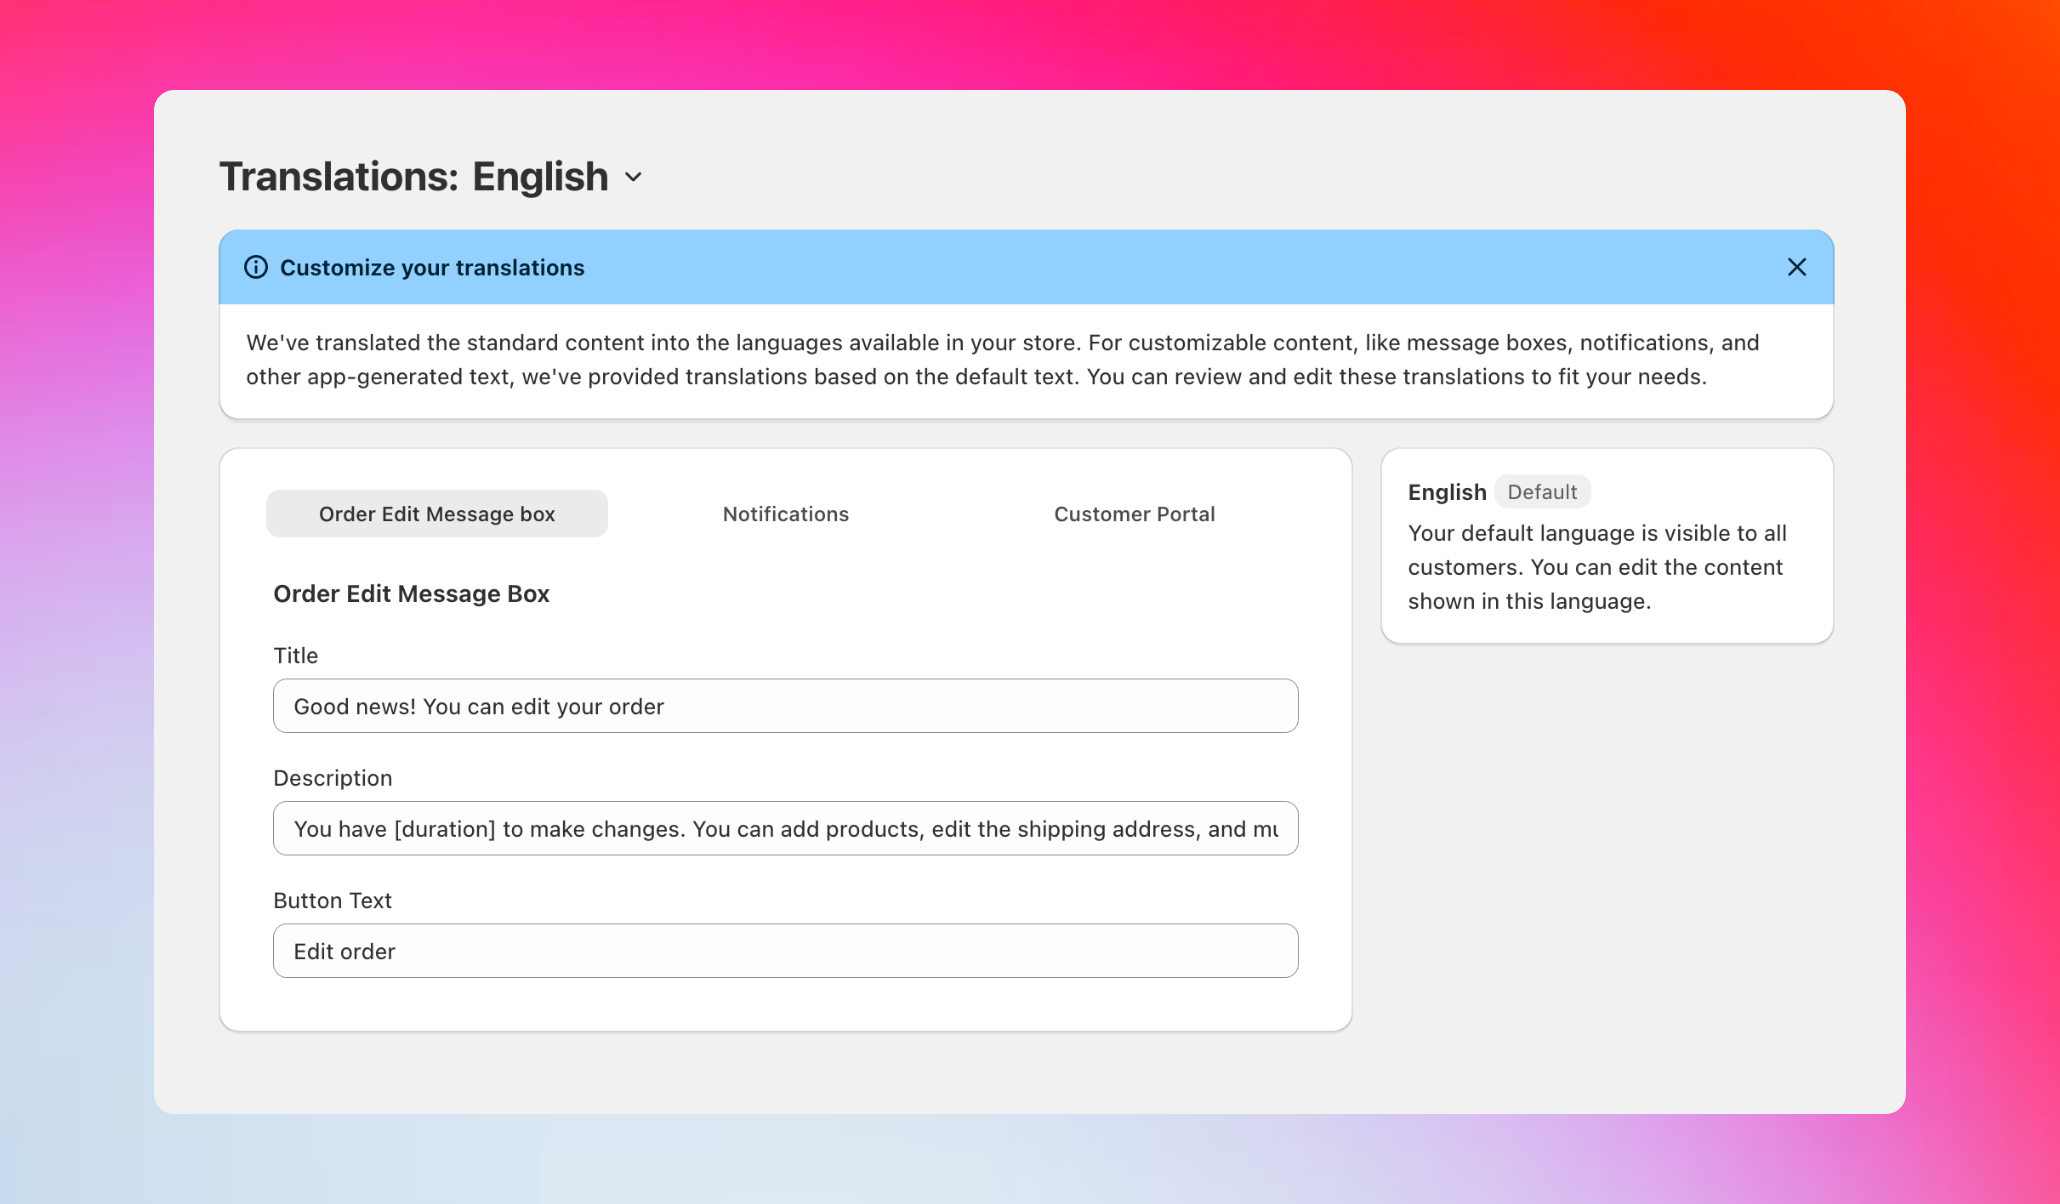
## 7. Optional, customize text and languages
In the Revize sidebar, select Translations.
Edit the customer portal text, message boxes, and notifications. Keep it on brand and clear.
***
## 7. Optional, customize text and languages
In the Revize sidebar, select Translations.
Edit the customer portal text, message boxes, and notifications. Keep it on brand and clear.
 ***
## Next, place a test order
You are ready to test. Place a draft order or a real test order, then edit from the Order Status page to see the full flow.
Step by step, with a Shopify video on draft orders.
Deep dive into the edit window, refunds, and permissions.
***
That is it. Revize is live. Customers can fix mistakes after checkout, your team saves time, and you capture more revenue.
***
## Next, place a test order
You are ready to test. Place a draft order or a real test order, then edit from the Order Status page to see the full flow.
Step by step, with a Shopify video on draft orders.
Deep dive into the edit window, refunds, and permissions.
***
That is it. Revize is live. Customers can fix mistakes after checkout, your team saves time, and you capture more revenue.